Destiny – Exotic Bounty Guides

This entry is part [part not set] of 15 in the series Destiny

These appear to be random. I would assume that you need to get at least to 20 and possibly to an even higher Light level to get one to spawn. I got one once I reached Crucible rank 2 (3,500 total rep). [I’ve now gotten 4 Exotic Bounties and Bam has gotten 2. It’s completely 100% random] When you do get the trigger the Bounty Tracker will offer you 3 Gold Bounties with somewhat obscure descriptions. These bounties are for Exotic Weapons and are really quests with multiple parts to receive your reward. As we find and do these we will be creating guides to help you unlock them.

JUMP RIGHT TO THE GUIDE YOU ARE INTERESTED IN

Shattered Memory Fragment – Pocket Infinity – Fusion Rifle
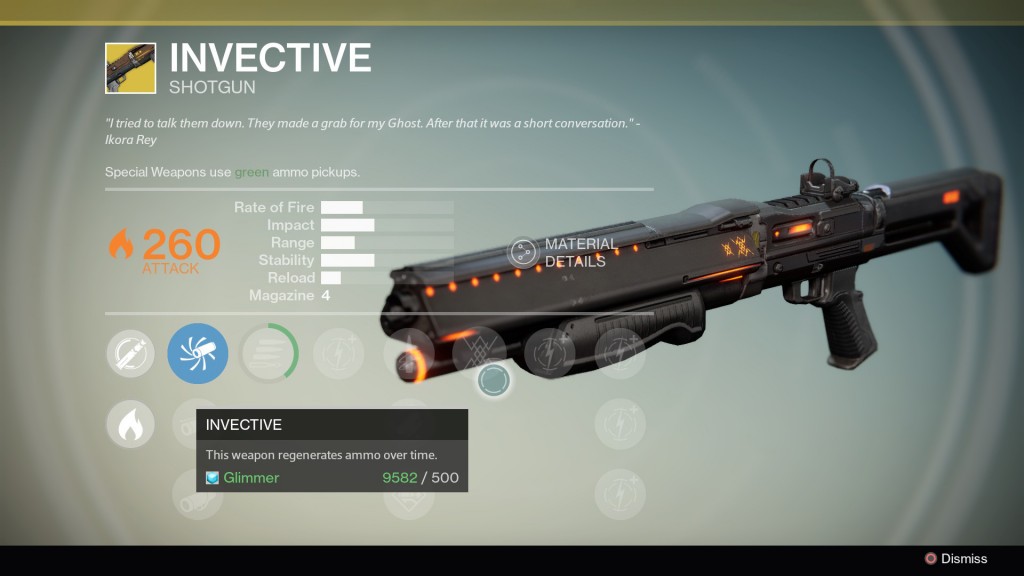
A Dubious Task – Invective – Shotgun
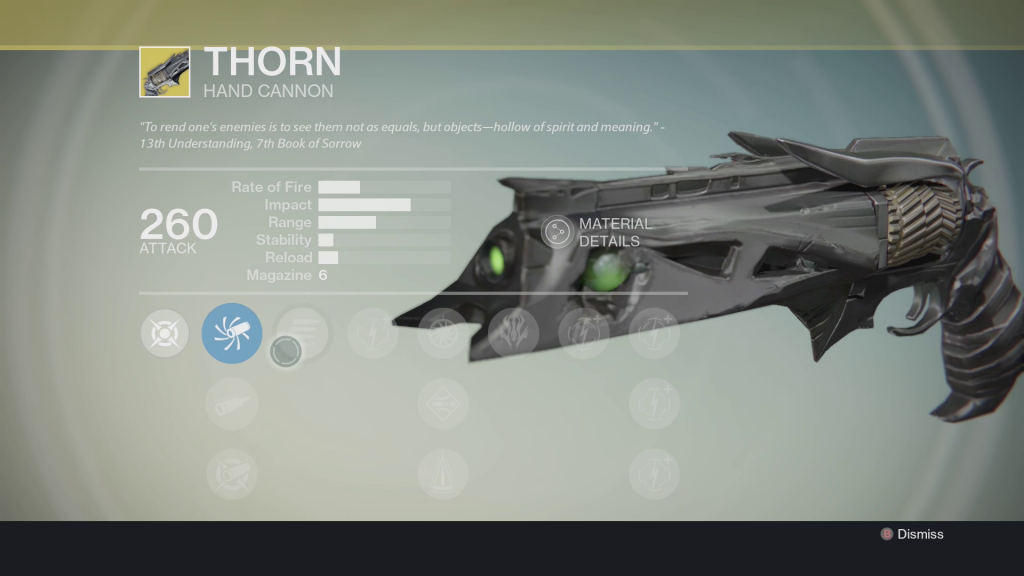
A Light In The Dark – Thorn – Hand Cannon
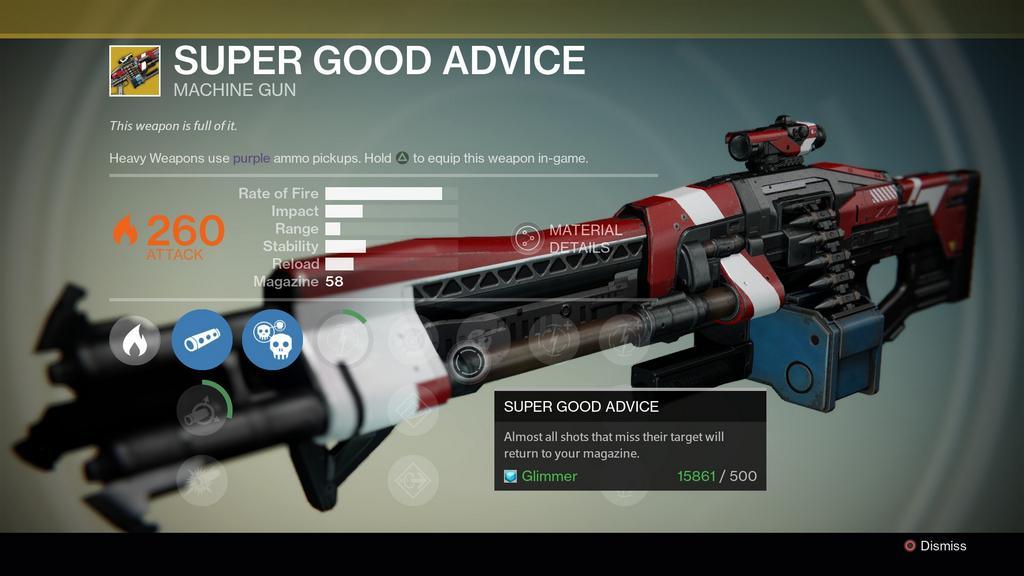
A Voice In The Wilderness – Super Good Advice – Machine Gun
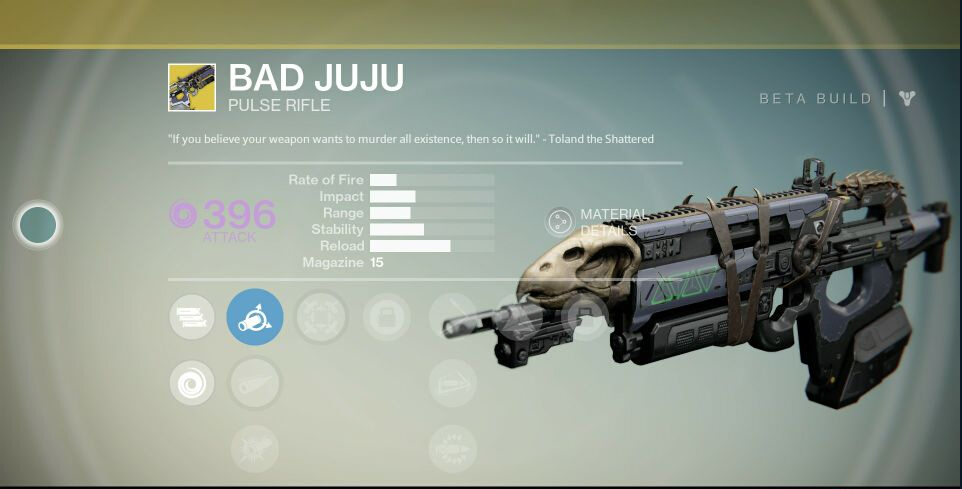
Toland’s Legacy – Bad Juju – Pulse Rifle


Shattered Memory Fragment – Exotic Weapon Bounty (Pocket Infinity – Fusion Rifle)


Track down Fireteam Tuyet’s last stand.
Destination: Venus – Patrol
Head to the city area from the first few missions on Venus. Just past the large statue is a small building on the left. Enter and on the left will be Dead Ghost you need to scan.

DAMAGED GHOST – Kill a Vex Gate Lord with the Heroic modifier active.
Destination: Venus – Eye of a Gate Lord (Mission)
You need to complete this mission with the Heroic modifier which means you need to do it on level 17 or above. Then simply complete the mission by killing the Vex Gate Lord at the end.

RESTORED GHOST – Bring the Unlocked Ghost to the Speaker in the Tower.
Destination: Tower
Pretty easy step. Just go to the Speaker to continue.

FUSION RIFLE SCHEMATICS – Bring the Fusion Rifle schematics to the Gunsmith.
Destination: Tower
Now just take it to the Gunsmith.

DEPLETED EXOTIC WEAPON CORE – Charge the Core by dismantling 10 Rare or higher quality Fusion Rifles
Destination: Loot Farming
So if you get really really lucky the Gunsmith will be selling Rare Fusion Rifles. I have seen him selling rares but not Fusions Rifles yet so I don’t know if you can buy just one or as many as you want. You can check the Bungie.net website and under Tower select the Gunsmith to see what he is currently selling. It refreshed every 3 hours. Your most expensive option is to buy Fusion Rifles from the Crucible or Vanguard Quartermasters. You need to be Faction 3 and they will cost you 150 Marks. Other than that you will need to get Secondary Weapon Engrams and hope they become Fusion Rifles of Rare or Legendary status. Check out our Farming Guide HERE for locations you can try to farm Rare Engrams and just hope for the best. Of course anything that has a possibility of Engrams will work so you can play Crucible or Strikes or whatever your heart desires as long as you end up Dismantling 10 Fusion Rifles at the end. The Bounty does have a tracker so you can check your progress.

CHARGED EXOTIC WEAPON CORE – Bring the Charged Core to the Gunsmith.
Destination: Tower
Now just take it to the Gunsmith.

UNSTABLE PROTOTYPE FUSION FRAME – Kill enemies in a Weekly Nightfall Strike until the Fusion Rifle stabilizes.
Destination: Weekly Strike Mission
You need to be high level to even be allowed to try Nightfall Strikes and they are level 28. You need to get 200 kills within these Strikes to finish this section. Nightfall is if your party dies you have to start the entire thing over. Take note that you need to use Fusion Rifles for the kills to count. The kills do not start counting until you get into the darkness area. The low level enemies outside of the actual strike area do not count but once you are fighting level 28s all of these kills count. Only your kills count for this one but you’ll want a full team to help out. If you want to bust this out solo I would suggest a LOT of Special Ammo Synthesis. Make sure you just bypass any opening area low level mobs as these don’t count towards your total.

My Summoning Pit Run:
Sparrow until I get past the 3 opening Knights and into the Strike proper. In the first real area you can still respawn. You want to immediately kill the two Thralls that are just sitting there when you get into the area. Then I bum rush the 3 Acolytes and try to one shot them point blank. If I can move on to next then fine, if I die then I bum rush the next. When these 5 enemies are dead I hug the left ledge and rush to the first REAL area. Here set your Ghost and then turn towards the room and jump to the left platform. Thralls will rush you from the door in front of you and this is where you get your kills. When the Knights show up I try to clean up any Thralls left lingering and then let the Knights kill me to restart. Get about 20 a run.

STABILIZED PROTOTYPE – Return the Prototype to the Gunsmith
Destination: Tower
Turn this in to the Gunsmith and you get your Pocket Infinity!

Pocket_Infinity


A Dubious Task – Exotic Weapon Bounty (Invective – Shotgun)


A Dubious Task is the Exotic Weapon Bounty that will allow you to unlock the Exotic Shotgun, the “Invective”. This is my personal first exotic bounty(This is Bam BTW) so I’m gonna show you step by step how I unlocked it and what you need to do. As I was turning in some bounties to Xander 99-40 I was thrilled when I saw that I had luckily got a chance to do an Exotic Weapon Bounty. It’s all luck really, just keep turning in bounties and eventually hopefully you’ll get one.

Talk to Ikora Rey.
Destination: Tower
For our first step we simply need to go to Ikora Rey to get PART I of our bounty. She is the Warlock Vanguard, found in the Hall of Guardians in the Tower. Simply talk to her and accept first part of the bounty.

A REQUEST FROM IKORA PART I – Complete a total of 5 Strikes without dying.
Destination: Earth (Strike Mission Devil’s Lair)
This seems like it would difficult, but it’s not hard at all, just time consuming. Go to Earth and select the strike mission, Devil’s Lair. Beat it five times without dying to complete this step. This does not have to be consecutive.
There are three different section of the strike. One tasks you with defeating waves of enemies, the next asks you to beat a giant robot spider and last you need to beat Sepris Prime, who is a giant purple mechanical eyeball. The main thing you have to do is not get cocky. Don’t attack everything and everyone with reckless abandon. Take your time, watch your health, and just get it done. The picture below will show you three very important spots to stay safe and not get killed.

For the first section, stay up on the catwalk and stay to the far right. For the second section, stay all the way back behind this tractor trailer and stand on the hood. For the last section, stay back and to the left by the stairway.

For the first section, stay up on the catwalk and stay to the far right — For the second section, stay all the way back behind this tractor trailer and stand on the hood — For the last section, stay back and to the left by the stairway

A REQUEST FROM IKORA – COMPLETED – Bring the completed request to Ikora
Destination: Tower

A REQUEST FROM IKORA PART II – Earn a Kills\Death spread of 25 in the Crucible
Destination: Crucible
Now you must head back to Ikora in the Hall of Guardians to turn on PART I and get PART II. The next part of the bounty asks you to get a 25 KD spread in Crucible! That’s some Cruci-bull-shit!!!! Now at first I thought, as well as a lot of the internet, that you needed to get 25 kills and 0 or 1 death. Thankfully this is not the case. It’s not a 25 kill death ratio, it’s a 25 kill death spread. Meaning you need to get 25 more kills than deaths. So that could mean going 40 kills and 15 deaths or 50 and 25 or even if it took you forever you could go 500 and 475. It’s over as many games as it takes. For me it took just two matches. After the first game, that I joined late, I was at 6 out of the 25. Then I played the next match and I kept checking the bounty to see that it was moving up and up until I got the 25. As soon as you obtain the 25 kill death spread you are done. It will tell you in game and even on the kill feed so anyone and everyone can see that you finished that step. After you get the 25 kill death spread you can even die a bunch and it still won’t change anything. When you get it you get it. Once your match is done head back to the tower and talk to Ikora again.

A REQUEST FROM IKORA – COMPLETED – Bring the completed request to Ikora
Destination: Tower

A REQUEST FROM IKORA – PART II – Complete a Weekly Challenge Acivity
Destination: The Standard Weekly or Nightfall Strike Mission
Once you talk to Ikora again you will be tasked with completing one of the weekly challenges, strikes. Each week Bungie resets the weekly strike mission for all of us to do. For me, this weekly challenge was the Strike on the moon. Just pick the easiest level possible, it usually starts at 22. You can go it along, but it’s probably smarter to take a fire team with you. As soon as you’ve beaten it you will see that you’ve finished that step in the bounty, your bounty now also looks completely with a purple orb as the icon. Now you need to head back to Ikora again.
 

A CLOT OF DARKNESS – Return to Ikori Rey
Destination: Tower

INVECTIVE [UNCHARGED] – Purchase an Invective shotgun component from the Gunsmith
Destination: Tower
Now that we’ve talked to Ikora again it’s time to go to the Gunsmith, Exo. You will see a green arrow above his head, he is right next to the awkward looking tree in the very start of the tower. When you talk to him you will see that he has something purchasable on the top right corner. This is shotgun parts that Ikora needs. Except if you want to get the part [Golden Age Shotgun Magazine] from Exo you will need to trade in 50 Special Ammo Synthesis. You probably have a few already, so to get the rest just buy them right there from the Gunsmith. Each one costs 250 glimmer. So you’ll need a lot saved up. 50 special ammo consumables costs 12,500 glimmer! Once you have 50, which you can see tracked by highlighting the shotgun parts your about to trade in for, get the parts and be on your way.

INVECTIVE [UNCHARGED] – Return Invective to Ikora Rey so she can integrate the component
Destination: Tower
Now that we have the shotgun parts, take them back to Ikora in the Hall of Guardians in the tower. All we need to do now is just select the bounty as soon as we talk to her and BAM we have our brand new sexy exotic shot gun! The Invective!
Hope all of this has helped! Thanks!
-Bam

invective


A Light In The Dark – Exotic Weapon Bounty (Thorn – Hand Cannon)


Complete “The Summoning Pits” Strike on the Moon.
Destination: Moon
This first part is just to complete “The Summoning Pits” on the Moon which is a standard level 12 Strike.

DEPLETED HAND CANNON – Harvest the energies of Hive on the Moon to activate the weapons
Destination: Moon, The Dark Beyond Mission
You need to kill 500 Hive. The best place is the The Dark Beyond missions. Do it on a level that you can be damaged. Fight your way to the Temple of Crota. Here you want to kill the Hive that rush the door and then die BEFORE killing the Knight. This will respawn the encounter and you can farm kills until you have 500. If you have people with you their kills count towards your 500.

DEPLETED HAND CANNON – Use Void Damage to defeat Guardians in the Crucible. Death will slow your progress.
Destination: Crucible
First you have to have weapons with Void. That’s the Purple Swirl type of damage. You can play any list you want. You will get +5 points for each death due to Void damage and you will lose -2 points for every death you have. You need 500 points to advance to the next stage so if you are perfect this is 100 kills.

CORRUPTED HAND CANNON – Bring the hand cannon to the Speaker.
Destination: Tower

CORRUPTED HAND CANNON – Cleanse yourself and the weapon with an infusion of Light.
Destination: Tower
You need to buy this from the Speaker for 1 Mote of Light.

CORRUPTED HAND CANNON – Bring the weapon to Ikora Rey.
Destination: Tower
Ikora Rey is the Warlock Vanguard.

CORRUPTED THORN – Kill Xyor, the Unwed
Destination: Moon – Special The Summoning Pits Strike
This is a level 26 strike. You need to fight your way through to the final boss area with Phogoth. Now keep killing the Knights and Acolytes and all the other mobs but leave Phogoth alive. Xyor, the Unwed will spawn from the third drop ship that arrives at the bottom area. You can stay in the second room right before Phogoth and work enemies from there. Don’t stay in the room right outside as a Shrieker will spawn in this room. You then need to kill Xyor who is a high level Wizard. You can finish the Strike or leave once the bounty updates.

UNBOUND THORN – Return to the Speaker
Destination: Tower
Go to the Speaker and he will give you Thorn. Congrats you have a Exotic Hand Cannon.

exotic_thorn


A Voice In The Wilderness – Exotic Weapon Bounty (Super Good Advice – Machine Gun)


This is by far the easiest of all the Exotic weapon bounties. The only tricky part is that you have to wait til Xur shows up during the weekends. Other than that this will take you about an hour, if that.

A VOICE IN THE WILDERNESS – Search loot caches on Mars for clues.
Destination: Mars
You will randomly find the item you are looking for from loot chests. Just keep working standard farming loops through the city and caves until you get the item. It could be in the first or it could take you 20 or more chests. Just search through one area until you’ve looked at all the spots chests are found, if it’s not there move on. You can even look back in old spots where you already searched, a new chest might appear and it might be in there. You only need to find the one fortunate chest. It took me 20 minutes, it can take much shorter or much longer depending on your luck.

A VOICE IN THE WILDERNESS – COMPLETED- Hand in the Machine Gun
Destination: The Tower
Now what we need to do is go to the tower and visit the Gunsmith. This is extremely simple. Just head to the Gunsmith and he will give you the next step of the bounty, which is going to be checking in on Xur, the agent of the nine.

A MOURNFUL GUN – Acquire a Pristine Golden Age Ammunition Module from Xur, the Agent of the Nine.
Destination: The Tower
Xur is the agent of the nine who sells exotic goods on weekends for strange coins and motes of light. He moves around in many different places throughout the tower each week. For me he was under Future War Cult area in the Tower Hanger. Make sure you have one strange coin, if you don’t have one play the strike of the week and you’ll be rewarded with at least 3. There are other ways to get strange coins as well. Find Xur and you will be given an option to acquire a Pristine Golden Age Ammunition Module for one strange coin. Do that and you’re on to the next step.
(PS… Check out this handy page that tells you all of the goodness that Xur is selling each week! http://gameguidecentral.com/destiny-xur-agent-nine-exotic-stock/)

A PLEASED MACHINE GUN FRAME – Kill enemies with Machine Guns (500).
Destination: Anywhere (Moon: The Dark Beyond recommended)
I recommend buying some Heavy Ammo Synthesis from the gunsmith before you get going. You will get some heavy ammo drops, but it’s easier to buy a few of these instead.
You can kill 500 enemies with Heavy Machine Guns anywhere, but I think the best place is on Moon on the story mission THE DARK BEYOND. At just level 6 you will rip through the bad guys and there’s a part of the mission where you open a huge gate and swarms of Hive come rushing through like cockroaches on steroids. Play the mission up until the cut-scene when you try to revive a dead guardian. Kill all the enemies with your heavy machine gun EXCEPT FOR THE KNIGHT! DO NOT KILL THE KNIGHT! After you take down a bunch of the enemies stop shooting and let the knight kill you. If you allow the knight to kill you it will reset you at the beginning of the gate opening and you can destroy the hive over and over, picking up heavy ammo and using your synthesis when needed. Keep doing this until you get your 500 kills. It should take you less than 10 minutes.

AN ENTHUSIASTIC GUN – Bring the frame to the Gunsmith.
Destination: Tower
Last step is as easy as it gets. Fly back to the Tower and visit the gunsmith again. He will have your brand new shiny new gun smell exotic heavy machine gun waiting for you. The “Super Good Advice” is the name of the gun. It has high fire rate and slightly low impact. It’s got some good abilities to unlock like really fast reload and much higher stability. It’s special features are that it get’s upgraded damage for a period of time with a kill and missed shots have a good chance of returning directly back into the clip.
I hope this helped, good luck and thanks!
-Bam

super_good_advice


Toland’s Legacy – Exotic Weapon Bounty (Bad Juju – Pulse Rifle)

Complete a Weekly Heroic or Nightfall Strike.
Destination: Standard Weekly or Nightfall Strike.
Obviously the weekly will be a lot easier to complete.

TOLAND’S JOURNAL [FRAGMENTED] – Bring the Journal to Ikora Rey, the Warlock Vanguard in the Tower.
Destination: Tower

TOLAND’S JOURNAL [FRAGMENTED] – Track down the fragments of Toland’s Journal by completing Strikes on any Destination
Destination: Strike Playlist
You now need to complete 25 strikes of any kind. You can directly pick from a planet, do Strike Playlist, Weekly, Nightfall whatever just do 25 to completion.

TOLAND’S JOURNAL [ENCRYPTED] – Bring the Journal to Ikora Rey
Destination: Tower
For the millionth time. Ikora Rey is the Warlock Vangaurd.

TOLAND’S JOURNAL [DECRYPTED] – Bring the Journal to the Gunsmith

BLACK MARKET COUPON – Obtain a darkness infused weapon frame from Xur.
Destination: Tower
Xur is only in game from Friday morning to Sunday morning. His location changes week to week. This part will cost you 1 Strange Coin.

DARKNESS-INFUSED WEAPON FRAME – Bring the weapon frame to the Gunsmith

DARKNESS-INFUSED PULSE RIFLE – Defeat Guardians in the Crucible.
Destination: Crucible
10,000 points. No negatives for deaths just grind the kills out.

SATED PULSE RIFLE – Return the weapon to the Gunsmith.
Just go back to the Gunsmith and he will give you your brand new Exotic Bad Juju!

bad_juju

Destiny – Loot Farming Guide – Lots of Areas

This entry is part [part not set] of 15 in the series Destiny

There are a lot of reasons to loot farm in Destiny. You want engrams and don’t have a team to do Strikes or you think Strikes are repetitive and boring and it’s not fun or profitable to have to spend 10 or so minutes to kill a boss that doesn’t even have a loot table. Turning in Engrams also levels up your Crypto-Archeology level and every time you gain a level you will get free Engrams from the Postmaster.

Also farming materials (Spinmetal for one) helps raise Crucible and Vanguard faction and provides super easy Marks. Materials are also needed to upgrade Legendaries and Exotics. In case you didn’t know you can turn a 50 stack of materials to either the Vanguard Quartermaster in the Hanger or the Crucible Quartermaster downstairs and they will give you +25 Faction and +5 Marks (as long as you are below your 100 weekly max). There is also a bonus that if you kill 1,500 enemies on a planet then more materials will drop. It’s not very specific but I’ve started to get 2 from a material node instead of the standard 1 over half the time.

Am working on vids and keeping track of stats to really show what each area is capable of.

Earth – Skywatch (Patrol)

UPDATE 9/25/2014 = Patch 1.0.1.5 – Bungie has removed the Cave via patch! Other options still working at this time.
This by far the best found so far. Then you get to Skywatch head to the left and there will be a small hill. There are several concrete slabs sticking out of the ground. You want to be on these but NOT in front of them. Look towards the building in front of you and there is a small cave below it that should have a never ending stream of Hive coming out. Just keep blasting them until you get bored. The best part is you can just sit there and go AFK and take turns doing the shooting and the loot will still drop. The biggest issue is that if even one Hive gets out you need to eliminate them before more will spawn. Things that mess this up are other people who get too close to the cave kills the spawns and there is a non-public event war that happens with pretty high level mobs that can kill you if you go AFK. If the Hive get out of the cave you need to kill them all or the spawning will stop. Please note you can NOT loss Legendaries. I know its exciting to see but they will be waiting for you later. Don’t go running into the cave killing the spawn every little drop you get.

PROS:
1 – Lots of enemies to kill
2 – Can be done Solo but due to number of Hive 2 is recommended

CONS:
1 – No Material drops
2 – Other players can grief the location
3 – Even one Hive out of the area equals no new spawns

Moon – The Dark Beyond (Mission) – Temple of Crota Entrance

Options: Levels 6, 9, 20, 24, 28
Setup Time: 8 minutes
I did this on level 24. The doors will open and a FLOOD of Hive will come right at you. Just shoot straight ahead and take as many as you can before they kill you. DO NOT clear the entire area. You want to die and restart. I’ve now done this on level 6, 9, 20 and 24 and see no difference in drops so do it so that you can get the kills but the enemies still kill you without you having to stand there and take it for awhile.
Stats: Level 24 – :30 of farming – 1 Leg, 4 Rares, 18 Greens – 785 kills

PROS:
1 – Lots of enemies to kill
2 – Can be done Solo
3 – Range of level options
4 – Instance, so no interference

CONS:
1 – No Material drops
2 – If you do too well you will checkpoint past the area and need to restart the entire mission

Venus – The Nexus (Strike)

Level 14 Only
Setup Time: 10 minutes
You will want a full team as randoms will definitely ruin this. You need to fight all the way to almost the end. You will come to a cave section with some warning tape. Once you clear this cave you will be out on a ledge. There will be a large drop of Vex at the end to kill. Once you kill them all the entire team leaps to your death to reset.
Success: :90 of farming – 1 Leg, 9 Rares, LOTS of Greens

PROS:
1 – Instance, so no interference

CONS:
1 – Need a full fireteam
2 – No Material drops
3 – Ledge could lead to possible loot loss

Earth – Devil’s Lair (Strike)

Level 9 Only
Setup Time: 0 minutes
This is a loop farming of Spinmetal and Crates in the opening area of the Devil’s Lair Strike mission on Earth. Technically you can spawn into the instance and get matched up with a Fireteam and just stay in the opening area. The bonus to having a team in here is that there is a Public Event that spawns and also to just not be a dick to other players trying to do the Strike leaving them a man short and you just stay in the opening area.

PROS:
1) Instant set-up
2) Spinmetal
3) Public event possible

CONS:
1) Strike mission so randoms
2) Not many engrams
3) Higher level area so lower level Guardians could die repeatedly

Moon – Archer’s Line (Patrol)

Level Whatever
Setup Time: 0 minutes
This is a cave farming loop around the very first opening area for Loot Chests and Helium Fragments. We are checking all the caves and all the building along with a few other open areas for chests and materials to pick up. Always make sure to check the large building in the back as this is a 90% loot location with probably a 10% chance of having 2 loot crates. If you do the full loop it should be respawned by the time you get back.

PROS:
1) Low level area so safe
2) Possible Public Events
3) Materials

CONS:
1) Low engram chance
2) Other players are running around messing with spawns

Earth – Forgotten Shores (Patrol)

Level Whatever
Setup Time: 1 minute
This is a cave loop on the Forgotten Shores. There are 5 caves and the ship hulls to look through. It’s a high traffic zone though so be prepared for some competition for loot chests. There are public event and there are also Captains with some large range that will be shooting at you. The bonus to this area is you can get to everything while on your Sparrow so it’s a pretty quick loop. People say chests spawn on the rocks on the road up to Skywatch but since you have to get off your Sparrow to do it, I skip it unless I can see one as I fly by.

PROS:
1) Low level area so safe
2) Possible Public Events
3) Materials

CONS:
1) Low engram chance
2) Other players are running around messing with spawns

Destiny – FAQ

This entry is part [part not set] of 15 in the series Destiny
What is Light? Why do I need it? And how do I get it?

Once you hit level 20 there are 10 more Light levels. Your 20 on the left of your Guardian in the “character” screen is no longer going to change. You will have a new Light level on right. You will now start finding Helmets, Gauntlets, Chest Armor and Leg Armor that will have the Light property. Once you obtain enough of this equipment your Light level will rise automatically. If an armor item has abilities you can level up, typically your Light will increase with each ability. Following is a table with how much Light you need on your Armor to gain a new Light level.

Light AmountLight Level
2121
3222
4323
5424
6525
7626
8727
9828
10929
12030

Can you help with some of the more difficult bounties?

Overcharge – Kill 2 enemies at once with a Fusion Rifle – I like to go to Lunar Complex on Earth. This is one of the first missions against the Hive Wizard. There is a large amount of enemies in close quarters. Then just leave and wait for them to respawn.

Exalted Hive – Kill 10 Hive Majors or Ultras – The biggest issue here is once you hit level 20 alot of the previous Majors and Ultras no longer qualify since they are too easy. There are two areas on Earth where there are Majors and Ultras around level 20. The first is Bunker RAS-2, which is in the basement of the big refinery on Forgotten Shores. There is 2 Elite 18 Knights and 1 Major. The other area is behind the downed helicopters in Skywatch. This area has a single Elite. It will be either a Knight or a Orge. Both of these unfortunately have a fairly long respawn time.

What are the unlocks as you level?

Level 16 – Strike Playlists
Level 18 – Crucible Marcs and Vanguard Marcs (This is faction money to buy Legendaries with. You can only earn 100 per character per week)
Level 20 – Legendary and Exotic Gear and Light Levels

How do I get Vanguard Marcs and Crucible Marcs?

Crucible – You get 2 for a loss and 3 for a win in the Crucible. Pretty straightforward.
Vanguard – You get 4 per public event. You also get Marcs for the Strike Playlist depending on the level of difficulty you choose.

Also when you turn in 50 of base materials to faction vendors you can get 5 Marcs for either Crucible or Vanguard depending on who you turn it into. Vanguard Quatermaster is in the Hanger and Crucible Quartermaster is downstairs.

How do I get Exotics?

You can buy them with Strange Coins from Xur from Friday to Sunday morning. 13 coins for armor, 23 coins for weapons.
You can buy a Exotic Engram from Xur that will guarantee a random non-specific class Exotic for 23 Motes of Light.
You can get them from Legendary Engrams.
The bounty hunter will very very rarely give you a Golden Bounty that will have a Exotic as a reward.

Achievement Guide: Flockers

Bleederboards – 25gs – Look at what you’ve hurt.


On the main menu select Leaderboards. Then move over to Leaderboards and click until it shows Sheep Killed. You don’t even need to have scored on the leaderboard yet.

Bespoke Winner – 25gs – Complete any level with a customised sheep.

You get this for finishing any level with one of the Rewards active. The quickest is Designer Hat which you get as soon as you finish the first level. Just go into Rewards, activate it, then finish any level.

Just The Start – 25gs – Complete the first 3 levels.

Quick and easy. Just finish the first three levels with any score.

Four Friends – 25gs – Get 4 sheep into the exit at once within 1 second.
Get In – 50gs – Get 20 sheep into the exit at once within 1 second.

Very easy on level 2 Counting Sheep. When you get to the last section place a 2 high blocking wall on the right. Then place a 2 high stairs just to the left so it locks all the sheep in a small space. Then release the 2 high wall to send a huge concentrated wave into the exit all at once.

Air Burst – 25gs – Explode 2 sheep while they are in the air at the same time.


On level 3 – Flock And Awe – You will need to blow a large wood block after getting jump and super. Hit two sheep with explode in a row right as they are about to jump down to the block of wood. They will hit their timer as they jump up the wood and both will explode in the air.

Woolly Jumper – 50gs – Have 20 sheep jump at the same time.


Level 3 – Flock And Awe – Use a 2 point start to lock all the sheep into the small middle right ledge with the sleeping sheep. Lock them in tight to the right wall. Then when all the sheep are ready (you should have around 30) release them and you will easily get 20 in the air at once.

Dead again – 50gs – Kill 500 zombie sheep.

First you need to unlock Zombie Sheep by killing 5000 other sheep. Then this is cumulative after that.

Ewe go boom – 50gs – Blow up 999 sheep.

Using the bomb counts as 1. But any sheep catch in the blast count also. Same goes for the landmines. There is a landmine in level 3, Flock And Awe.

Caught In A Mosh – 50gs – Get 20 punk sheep moshing together.


To unlock the Punk Sheep you need to impale 20 sheep within 1 second. Best place to do this is level 3 Flock and Awe. At the top section is a three pronged spike. Trap your sheep until the prong is almost to the top and then release to get 20 of them killed at once.
After you get the Punk Sheep (and make sure to select them in the Rewards screen) moshing is get 20 of them crushed at once. I did this in 6 – Lambdroid but anywhere you have a place to lock sheep up and then release them all at once towards a crushing obstacle will net you the achievement.

Fashion Warrior – 50gs – Try out 10 different styles of sheep (blood included).

This is for using 10 different rewards. Both the skins and the blood color mods count. You can check the requirements for various skins and blood colors under the Rewards section on the Home Page.

Halfway To Perfection – 50gs – Collect 30 golden fleeces.
Good As Gold – 50gs – Collect 20 golden fleeces.

There is 1 Golden Fleece per main level. Collecting it gives you a huge boost towards your points and is a requirement for a lot of achievements and for getting 3 stars on the levels.

Soft Landing – 50gs – Save 100 sheep from fall damage by landing on something soft.

You learn about this in level 4 – Sunday Lunch. This involves using a single block as a landing zone for sheep to fall on. I got 10 in this level so you can replay the level 10 times or work on this throughout the rest of the levels.

Cream Of The Flock – 100gs – Three star everything.

Three starring everything is not easy. Some levels require near perfection for a 3 star rating. Check out this playlist on our YouTube channel for 3 star level guides.

Doing Great – 50gs – Three star every level from the first theme.

The first theme is the first 20 levels. The game is broken up into 3 themes of 20 levels each.

Found It – 25gs – Unlock a secret level.
Keep A Secret – 100gs – Find and unlock all the secret bonus levels.

There are six bonus levels.
The first is found in level 4 – Sunday Lunch – and is almost impossible to miss. Allow the platform at the end to go down so you head into the warp behind the exit and you’ll walk through the secret level unlock on the way to the exit.

Winner – 100gs – Complete every level (including bonus levels).

There are 60 main levels and 6 secret side missions to complete.

Boss Slayer – 50gs – Three star 2 boss levels.

There are 6 boss levels and they are every 10 levels, 2 per theme. So you need to get to level 20 to see your second boss to get the achievement.

Review: Flockers

Flockers
box_flockers_w160
Cost
$24.99
Format
Digital
Size
5.86 GB
Available On
Xbox ONE [Reviewed], PS4
Release Date
9/23/14
Developer
Team 17
Publisher
Team 17
Modes
Single Player

Flockers is a Lemmings style puzzler where you herd sheep through a series of obstacles and try to get as many as you can to safety while avoiding death spikes and buzzsaws and a just a ton of other sheep life ending devices. The sheep’s part in all of this is to just go forward, period. They don’t think about how 20 sheep before them were just horribly sawed in half. Until you tell them differently, forward they will go. Like hardcore White Wilderness style. So yes, the first thing you are going to say to yourself is, “Self, this is Lemmings. But with Sheep.” and you’d be telling yourself the truth. Not that there is anything wrong with that. Lemming was a fantastic game, in 1991, when it came out. The question is does Flockers do it better or worse and does this style of game stand the test of 2 decades time?

The basic ability in Flockers is a system of blocks to aid you in moving about the stages. A single sheep block might help you climb a small ridge or allow you to aid other sheep in dropping from a high distance. From there you can add another sheep to the top to create a wall to block the sheep’s movement while you wait for a buzzsaw to move past. You can also stagger the sheep to create a series of stairs to climb to even higher area. The genius of this system is that these constructs also allow you to break them down in interesting way. Take the 2 sheep wall, add a bomb to the lower sheep and you just created a cannon to send the top sheep to press a button or reach a new area. During the first couple of levels I was worried that this lack of abilities would be this games downfall but these secondary interactions had a new level of planning to the game.

The other abilities are just as basic and straightforward. You have jumping, flying and making a bomb. Standard abilities to be sure but there are nuances here. Take the jump. It’s a pretty big jump and there are times when activating this ability too early will actually hinder you as sheep will jump over things you need them to hit, like buttons or waking up other sheep.

The graphics are what I can only call standard Team 17 graphics. Nice enough but definitely more 360 than ONE. Flockers looks almost exactly the same as Team 17’s last game Worms Battleground with the slightest of upgrades. Flockers provides an in-game challenge system where you can earn different skins and blood color. Yes, the color of blood your sheep’s bleed when they die horribly is customizable. These skins are modeled at a fairly high level of detail and you can see this higher quality when viewing the sheep close up, but that level of detail is lost when you zoom out enough to be able to see your entire flock at once so you can micro manage and keep them from dying every half a second.

One of the biggest opportunities missed here is when you get stuck with no way to finish the level. Lemmings had a bomb button that just tore the entire world apart and made it a little bit ok that you just lost horribly. In Flockers you just get to hit Restart. Kind of a minor, but in my heart a major, letdown.

There are 60 main level with every 10th being a “boss” level. Pretty much boss level means that there is something that is going to be actively trying to eliminate your sheep besides your own errors. There are also 6 secret levels unlocked by running over a special icon that is hidden in a standard mission. These secret levels offer up some pretty unique design. The first one being a group of sleeping sheep and you are scored by the number you can wake up in the time limit and then also keep alive. These variations here and there help to keep you going from one puzzle to the next without boredom setting in.

One of my issues is a complete lack of story. Now this is a puzzler so it’s not going to be War and Peace, but I’ve come to expect a funny little side story to my puzzler of late and there is pretty much nothing here. A 10 sec intro that doesn’t explain anything and doesn’t push anything forward in any way shape or form. It’s like they started to write and animate something and just got bored with and felt they had “put all this time into it so I guess we’ll put it in” type of situation. Opportunity lost there.

Let’s talk about difficulty. To just finish a level, that’s going to be easy. I haven’t seen a level where you need to get more than 1 sheep to the exit to count as completing the level, BUT if you are going for 3-star perfection, which there are several achievements tied to, it is brutal. You need to be perfect on a lot of levels. No mistakes, no misplaced sheep, no hesitation in placing your abilities. As I played in the review environment there were many early levels where I barely got 3 stars and no one else had. Obviously guides will be coming (I’ve filmed quite a few 3 stars myself) but on it’s own it can quite the challenge to get everything exactly right.

If you are an achievement hunter this game is going to be a bit of a challenge. The majority of the achievements (over 50%) are more end game style. 3 staring everything, killing a TON of sheep in various way. That sort of thing. One is for killing 500 zombie sheep, not too hard in a game about sheep getting murdered right? You unlock the Zombie sheep by kill 5,000 sheep, so its really an achievement for killing 5,500 sheep and when each level has around 30 or so sheep it is a bit of a grind.

Overall this is a fun puzzle game which the ONE is direly in need of and hits that nostalgia button at the same time. It’s tough difficulty is alleviated by the fact that even if you don’t 3 star something you can come back and work on it later without completely halting your progress in the game.

PROS:
1) Strong puzzler
2) Lots of levels

CONS:
1) Graphics are lacking
2) No story to help push you along

8.2
EXCELLENT


Review: Destiny (First 24 Hours)

This entry is part [part not set] of 15 in the series Destiny

Destiny
box_destiny_w160
Cost
$59.99
Format
Digital
Size
18 GB
Available On
Xbox ONE [Reviewed], PS4, PS3, Xbox 360
Release Date
9/9/14
Developer
Bungie
Publisher
Activison
Modes
Single Player & Multiplayer

So right before launch Bungie released a statement saying that there were no review allowed yet and they didn’t send review copies because no one is capable of reviewing Destiny until you’ve played like a bajillion hours. Well, I’m going to do this review after just 24 hours or so of real time and maybe 6 hours of play time. And after that amount of time I can emphatically say I am NOT impressed.

Destiny is no doubt a really beautiful game and I am glad to see games start to push beyond 360 and into the ONE era but graphics do not make the game.

As I started writing down info for a full fledged review I started to notice a increasing large stack of negatives. So I am just going to copy my list over here and then we’ll go through it one by one.

No internal volume control
Separate loadouts for single vs multiplayer needed
Single player abilities do not work the same in multiplayer with no guide as to differences
Only 4 multiplayer game modes
Only 10 multiplayer maps
Strikes are BORING
Patrol missions are interesting but super repetitive and time consuming for little reward
Achievements are not tracked
Info is on Bungie.net only including all clan info
General lack of information past sparse tutorial
No penalty for death
Fireteams are only 3 players
WTF is the story?

No internal volume control

Really? Are you f-ing serious here. There is not a single option to change music volume, game volume, ANYTHING. I record for YouTube and no volume control is insane. Let alone that music is your number one ticket to a copyright strike. I was going to say is this the 80s? but I can’t remember or name a single other game where you can’t control the in-game volume in this decade or any for that matter.

Separate loadouts for single vs multiplayer needed
Single player abilities do not work the same in multiplayer with no guide as to differences
Only 4 multiplayer game modes
Only 10 multiplayer maps

Let’s just look at multiplayer all together. The single player / co-op could not be any more different than the crucible multiplayer. Not just in the general sense of its PvP versus PvE. Things work differently, abilities work differently. But there is no information on this. What is important for a gun to be good in PvP vs PvE? What stats carry over? How do they relate? These are serious questions that are only answered by dedicated players just doing blind testing. This sort of info needs to be front and center. Also because of these differences there really needs to be different loadouts for your Guardians so that you can have a PvE ready vs having to move all your equipment over before switching to Crucible.
I don’t know a game in recent history that has had so few multiplayer modes and so few multiplayer maps. There are 4 modes at start. Let’s forget whatever made up names they put on these modes, they have Team Deathmatch, Free For All, 3v3 Team Deathmatch and Domination. So off the bat, nothing new. They didn’t create a single new mode type. All rehash. From what I can, and you can really only tell from looking at Grimoire cards, is that there are only 10 maps at the start also. And my god they are drab and boring. There is nothing dynamic or innovative or special about a single one of them. The only way I can even tell them apart is that one is slightly more towards blue than gray from the last one I played. One map had some doors that opened. They I didn’t even know where doors from the start as they were so lagged and delayed in opening that I missed the opening event the first time. There are a LOT of dead ends also, just places where I was trying to path from A to B to find myself smack dab in a solid wall.

Strikes are BORING

I guess the one and only Raid is really high level so I don’t even know a thing about that but I’ve played Devils’ Lair and it’s just as boring and retarded as it was in Beta. There are 3 parts. Boring ass long tank battle, insane no place to set up a defense wave section, and then final boring ass long sphere battle. And you’re done. Neither of these large enemies (Spider Tank or Splinker) are enjoyable in the least and are more about ammo management then any kind of real strategy. In fact it’s like Bungie knows how long and tedious they are because they automatically replenish your ammo magically at intervals of the battles. Not even a crate drop, just here’s more ammo in your gun. Your welcome.

This really goes for all the missions so far. Just boring and straightforward from one group of AI to the next. No flash, no interest, no solid reason to keep going.

Patrol missions are interesting but super repetitive and time consuming for little reward

So after you do a few missions you can just run around the worlds and pick up small missions that for whatever reason as tied to random sticks in the ground. You have to find a stick, and then you typically just call the Tower to ask what you are going to do. Why can’t these just be a menu selection? I’ll now tell you why, because 90% of what you do is just go from one end of the world to the other. The actual mission tend to last all of 1 minute, but it’s inflated because of the 1 minute of finding the mission and then 4 minutes of traveling to the actual mission location. There is no fast travel from within the world of any kind.

Achievements are not tracked

Didn’t the ONE just get a nice update so that achievements are more trackable? Not a single achievement in Destiny tracks percentage. NOT ONE. And my god for a game that Bungie thinks I should be playing for 100+ hours and years of my life these achievements are worthless. No imagination and nothing is remotely end game.

Info is on Bungie.net only including all clan info

I hated this in Battlefield 4 and I still hate it. Game forcing you to go to their website, which typically is down or slow, to get information that should be in the GAME. For a clan, I have to invite to group, then they have to go back to the site to actually make the group a clan and all of it, EVERYTHING, is only accessible on the website. WTF!

General lack of information past sparse tutorial

After your typical how to jump and how to reload, they tell you nothing. Nothing. There is no help of any kind on how to do anything in this game. At least The Golf Club had the decency to make some YouTube videos for their game.

No penalty for death

There is no reason to live in Destiny. Dying means nothing. My team was trying to find a Dead Ghost (Which is glitched anyway) and it was surrounded by mobs that were so high level that we weren’t even allowed to see their levels and we just ran in there and died somewhere around 50 times each trying to get this Ghost that wasn’t even there due to bad programming and it didn’t matter. Fact is we were actually lowering their health through the process and if we had wanted to spend another agonizing hour we could of actually beaten these 3 elites just based on Stalin-esk tactics of the individual soldier’s life doesn’t matter. In the end it would of been 300+ deaths to 3 death but we would of won the battle.

Fireteams are only 3 players

Multiplayer you can have up to 6 but the main game is 3. All night is “You guys have room.”, Nope, sorry we are LOADED up with 3 whole guys. Not a big enough world for more people. People are all excited that there are other Guardians running around the world. Not me. I am there to win my battles and get my kills with my friends, I don’t need randoms KSing everywhere I go. I appreciate any game with co-op as that is where my real enjoyment comes from but only 3 people is a joke.

WTF is the story?

Seriously. 5 or so missions in and WTF is going on and why the F am I supposed to care about it? Get a ship, get a drive, eliminate this area. blah, blah, blah the whole thing is told in one liners from the Ghost and the rest I have to read.

This game compares to me to Gears of War: Judgement (Which on Meta got a 79 and generally negative reviews from users) in that it is quick missions and rehashed (just GOW) multiplayer. That game to me is better than Destiny. It had a story, say what you want about how absurd Gear’s story got, it had a fully fleshed out story. The best part of Judgement was the story changed as you made the game harder. “I heard you had the best equipment”, “No sir, we only had pistols” and then you only had pistols for that mission if you selected to make it harder.

Let’s also draw comparisons to just released Free to Play Warframe. Now Warframe being FTP is a money grab. That’s just straight up fact. Pay $20 and you get this thing now. BUT, you can grind the whole thing out. It definitely has launched with more Modes and more Maps. The weapons system with weapons levels and mods to pick what you want your gun to do is a great system. Mods are still drops and still earned so you still have that loot to win system that Destiny and Diablo also live by. Warframe has a interesting crafting system to make your own weapons and items. I give a BIG BIG BIG nod to Destiny in graphics and party system but Warframe is getting better.

More maps are probably coming. More modes are probably coming. Paid DLC and maybe even free updates but I just paid $60 for this and it’s no where near $60 of content today which is when I am playing it!

If your game really doesn’t begin until level 20 why the FUCK am I playing the first 20 levels then?????

These are just some quick thoughts.

PROS:
1) Graphics
2) Party System

CONS:
1) Lack of Modes & Maps
2) Lack of info
3) Missions are lackluster and tedious

6.2
Average


Destiny – Dead Ghosts Location Guide

This entry is part [part not set] of 15 in the series Destiny
TOWER

1) Tower Plaza – Tower Watch ::
From the start, head left towards the North Tower but instead of going through the tunnel, head up the stairway to that goes to an overlook. This platforms looks over the main plaza. As soon as you make it up the stairs, go directly to the right. There will be a couple of crates stacked on each-other–the dead ghost is right on top and ready to be revived.
2) Tower North ::
From the start, head to the North Tower through the tunnel to the Speaker’s Chamber. As soon as you walk through you will see a bunch of crazy pigeons flying away; keep going straight. There’s a small walkway to the left, walk up the stairs to the left and the dead ghost will be on the ground also to the left.
3) Tower Plaza – Traveler’s Walk ::
From the start walk directly straight(but not down the steps)and up towards where you pick up new bounties. Go up the next flight of stairs and there will be an area called Traveler’s Walk area. This section is only open when there is an Iron Banner event running. So make sure you get in there and get the ghost when it’s open. There is a big gate that blocks the area off, this will open when the Iron Banner or any other “Event” is running. Go through this area, past Lord Saladin(who is the one you will talk to during the Iron Banner). The far right next to a balcony there will be the dead ghost on the railing.
4) Hall of Guardians ::
From the start walk directly straight and down the stairs. Walk past the two Crucible guardians on the right and left. Go into the Vanguard Strategy room where you would normally purchase armor from your guardian leaders. As soon as you walk into the room, turn to the right. You will see the dead ghost on the table.

EARTH


The Breach
1) Look Up ::
This is found on the very first level, when your personal ghosts revives you. It can also be found in explore mode if you go back as far as possible. In the level your ghost will light up a giant room and you will see “The fallen” enemies in the distance. Then your ghost will tell you that he found a weapon for you. From when you pick up the weapon, go around the corner to the left. As soon as you turn the corner, look up and to the left. There will be some pipes and an opening where the dead guardian will be sitting.

2) Don’t get wet ::
Still on the first level, in the first truly open room where you fight a substantial amount of enemies you will see a puddle in the middle of the room. From this puddle look the the left. Underneath a cat-walk and around a small pillar you should see the dead ghost in-between some pipes in the wall.

The Divide
3) Follow the signs ::
As soon as you come out of the breath and into The Divide you will see a billboard that reads “POGA”. The ghost is sitting in a ledge on the back side of the billboard. To get up on this, go behind the billboard and you will see a tractor trailer. Jump on the back of this. Then from here jump onto the trailer house to the left. Then jump on the next roof of the next building. From here jump onto the box on the roof that looks like an air-conditioner. Next you want to jump onto the higher roof that is right in front of you(All of this will be ridiculously easier to do once you get a double jump). If you don’t have a double jump yet, try to make the jump from the air-conditioner to the set of lights that resembles stadium lights for a ballpark. Hop to the right and try not to bump into the satellite when you do this jump. If you make it, jump once more to get onto the last roof. From here you can walk to the back of the billboard and revive the dead ghost.

4) Round and round ::
From as soon as you come out of the breach and into The Divide, walk directly straight under the billboard. You will come out into an open area where there will be plenty of enemies and a drop-ship sending in more. Hug the right wall and go the far right. There is an area that looks like you can walk to but as soon as you try the game will tell you to turn back or you will die. So instead of going to this area, turn left and you will see a big round open cylinder sitting on its side. Inside of this cylinder is what looks like a Christmas tree that fell down. Right next to this tree is the dead ghost.

The Steppes

5) Shed your fears ::
Find the downed helicopter used in restoration story mission. From here head towards the small shed on the small hill. This shed is right before a much larger shed that is surrounded by the fallen bad guys. In this small shed under a desk you will find the dead ghost.

6) Hiding in the bushes ::
Head towards The Mothyards from The Steppes. In the valley there is a pathway that wraps around a giant ditch in the ground. The ditch is filled with grass and bushes. Head towards the pipes in the back corner of the ditch. On the right side laying in the brush you will find the dead ghost that needs reviving.

The Mothyards
7) Tip of the wing ::
The Mothyards is a GIANT open area filled with crashed airplanes. As soon as you enter the Mothyards from the Steppes, go towards the cliff-sides on the right. Find the plane that has its wing tilted upwards toward the cliff. Climb up the wing and double-jump (or ramp with your sparrow) off of the tip of the wing onto the ledge on the cliff. There’s a cave that also has two layers because it drops down to a lower level. Don’t drop down, just look to the left side and you should see the dead ghost behind a rock.

8) Around the canyon ::
From the Mothyards you can travel through a canyon to go to the Forgotten Shores. Before you get to the shores, there is a waterfall in the canyon. Go passed the waterfall and around the next bend and there is a cave about 15 feet high in the corner. Climb the rocks and inside the cave is the next dead ghost.

Lunar Complex
9) Hiding with the Hive ::
Go to Lunar Complex, can be done on the mission the dark within or in open patrol. There’s a large room that is the first time you ever see “The Hive” species. In this room go to the far right. You should see a electrical box, double jump to get on top and you will see the dead ghost that needs awoken sitting on top.

The Forgotten Shores
10) Captain’s Quarters ::
There are a few ships that are crashed into the shore. Look for the second ship down and look to the left. You should see a piece of the ship, that happens to be the front of the ship. There’s also a wheel by this chunk. Inside is the dead ghost.

11) Death Trap ::
Go to the second crashed ship, which is right on the edge of the water (also right next to the second mission “Warmind”). Inside the room in the from of the ship there are a set of stairs. Go down these stairs a couple levels and you will be inside of a bunker. The enemies here are extremely high level. Either come back when you are level 20 or try to avoid them and find the dead ghost under the stairs.

Terrestrial Complex
12) Next to the gym socks ::
When you enter the Terrestrial Complex from “The Skywatch” area, you should see a set of lockers on the right in a small corridor. The dead ghost is in the middle locker.

Skywatch
13) Under the Heli ::
Look for the helipad that has a few crashed helicopters on it. On the edge of the helipad you can drop down to a ledge. Under the helipad there is a room, there’s a big hole in the wall you can see from the ledge. There’s also a very high level enemy in the room. Either come back at a high level to kill him, or use a friend to lure the enemy out. Quickly run in and find the dead ghost on a desk in the right side of the room.

Rocketyard
14) On the roof ::
As soon as you enter the Rocketyard jump onto the roof on the left-hand side. This is also the beginning of the “Devil’s Lair” level. Find the dead ghost on top of the roof.

Refinery
15) Under the Russian sign ::
When you enter the refinery you should see a small room with a white light above it. There’s also a Russian sign above the room. Go into the room and find the dead ghost in the room.

The Blast
16) Stairway to the bench ::
If you’re playing the level “Devil’s Lair” you should come into a room where you are fighting a giant Tank boss. Go to the left side into a room and up a flight of stairs. At the top of the stairs there is a bench, the dead ghost is sitting here waiting to be revived.

The Grottos
17) Along the shoreline ::
The Grottos has 2 high level enemies. It’s right past the Forgotten Shore. Jump in the sparrow and ride the shoreline past two level 20 bad guys. Keep riding the shoreline without going too far out to the sea or you will be killed. Stay on the shoreline and you will come to a pipe. Just to the left of the pipe is the final dead ghost on earth.

MOON

Archer Lane
1) Begin! ::
From the start of patrol on the moon (and many of the missions) go up the hill and head to the left. There’s a big facility to the left side. Before you would go inside and before you go under the building there is a platform that has a few fallen enemies on it. Take them out and head to the far right of this platform. Jump on top of a few boxes and look back towards the original spawn you started from. You should see a dead ghost on the support system. Double jump across and you should be able to get it.

2) Don’t fall ::
From the start of patrol on the moon, head towards the large geodome straight ahead. Behind the dome and to the right is the dead ghost. Go the the right and you will see a huge hole that you can fall to your death in. Go to the edge, but don’t fall. Look down to the right of a huge shadow going upwards and you will see a platform under you. Drop down to it and revive the dead ghost.

Hall of Wisdom
3) YOU SHALL NOT PASS ::
From the Geodome that’s in Archer Lane, go through the dome and down the hill into a Hive hide-out, the Hall of Wisdom. Head through the Hall of Wisdom. Keep going until you go into an open room that has a small bridge and a spawn point of a ship, wizard, and many Hive bad guys. Once you take them out, go to the middle of the bridge and look to the left. You should see the dead ghost across the gap. You can double jump or you can simply walk along the side of the wall and grab it.

VENUS

MARS

Destiny – Gold Chest Location Guides

This entry is part [part not set] of 15 in the series Destiny


EARTH

1) The Steppes – The first one is pretty much given to you during the intro. As you head to Dock 13 it is on a desk to your left.
2) Forgotten Shore – At the base of the ocean area you can head out to the left in front of the cliffs and it’s on a rock outcropping.
3) Forgotten Shore – In the winding stream area look for a small waterfall right before you get to the Shore. It’s in a cave near there. There is a also a Dead Ghost in this cave.
4) Lunar Complex – In the room with the Hive Wizard you can jump unto the ceiling of the room on the left.
5) Devil’s Lair – Can only get during the Strike. In the final battle with Sepkis Prime it’s under the right platform.

MOON

1)
2)
3)
4)
5)

VENUS

MARS

Review: Stick It To The Man

Stick It To The Man
box_stickittotheman_w160
Cost
$9.99
Format
Digital
Size
1.78 GB
Available On
Xbox ONE [Reviewed], PS4, PS3, Vita, Xbox 460, Wii U
Release Date
8/28/14
Developer
Zoink! Games
Publisher
Ripstone
Modes
Single Player

Stick It To The Man is a side-scrolling platformer / puzzler developed by Zoink! Games. The main protagonist is Ray and the story starts as Ray is on the way home from his job testing hard hats. Due to a unfortunate accident Ray is hit on the head by a mysterious canister and awakes to find that a long pink sticky hand is protruding from his head (think those sticky toys you get for 25 cents in a vending machine) and the rest of the story is about finding out what is it and why it’s there. No one but Ray can see that it is there and the game refers to it as a Spaghetti Arm. This spaghetti arm is your entire interaction with the environment. It allows Ray to read people’s minds and more importantly to make their thoughts manifest into physical objects Ray can use to navigate the world. Ray also uses this arm for fast movement. There are push pins plastered all over the map that allow Ray to quickly traverse the world and the game does a good job of creating paths that allow you to maneuver back and forth from one side the other. The main use of the arm though is to interact with world around him. Ray can peel back the layers of the world to reveal objects and characters inside buildings and vehicles and then pull those objects out and use them to advance to new areas.

rev1_stickittotheman

The game is very beautifully laid out in paper cut out fashion. This style of game art is really starting to catch on and when done right, as it is here, really looks good. (Is there a term for this type of art? Someone somewhere must of come up with some jargony name.) Everything you interact with is a sticker placed on top of this paper world and your job as Ray is to manipulate these stickers to solve your goals. One of the first such challenges is to take the teeth out of an alligator and give them to a small dog. This allows the dog to scare off some bad guys so you can progress. All of the puzzles are along this line and really the entire game is a series of puzzles to get from one area to the next. There is nothing Mensa level in Stick It To The Man. They are not trying to confound or confuse you, the puzzles are really here to advance the story. In fact if you look at the map it will plainly point out everything you can interact with and it’s really your job to just pick the right item at the right time.

Besides fetch style puzzles the only other obstacle are sections of enemies you need to maneuver around. You progress through these areas with a combination of moves and using their own thoughts against them. Come up on a agent who is thinking about you and this allows you to pull that image of Ray off of the enemy’s thoughts and place it on the face of another agent causing a small window of chaos for you to move to the next area. The one issue is that controlling the arm is unfortunately quite touchy and it can be difficult to pinpoint a single specific object when there are groups of things to interact with. During the later stages you need to manage the Agents through their thought stickers and I found myself performing an action that got me killed versus the one I wanted to do many times.

re2_stickittotheman

The story is what really keeps this game flowing. The voice acting is just excellent and even the most minor character has something to say and contribute to the story. Basically the entire game is Fetch, Outrun Enemies, Repeat but it doesn’t get boring because of the level of story telling that is going on. If you are just a playthrough to get it done type of gamer then you might find the repetition a little boring. But then again you really don’t get a chance to be bored because it’s not very long.

The length is a definite issue. There are a total of 10 chapters with the first 2 being short story / tutorials. To 100% complete the game took me about 3 hours and that is playing completely fresh and not watching any guides. It does hit that near perfect price point of $10. A lot of fast easy games are coming in at $7 but I feel the production quality here justifies the $10 price point. Once completed though, there is really zero replay value to Stick It To The Man as you really will most likely experience everything there is to this game the first time.

PROS:
1) Strong story
2) Puzzles are interesting

CONS:
1) Length is very short
2) All puzzles fetch style
3) Zero replay value

7.8
Good


Achievement Guide: Stick It To The Man

OVERALL GAME

A Mind is a Terrible Thing to Waste – 100gs – Read the minds of everyone ever

From Chapter 3 on you have the ability to read minds. Hold LB and then select a available brain using the RB and you will get a little scene of what they are thinking about. You can check your progress by going to Chapter Select in the main menu and at the bottom of the screen in each chapter will show you X/Y completed. During any chapter if you hold down X to see the map anyone still a ? is someone whose mind you need to read. The agents do not count.

CHAPTER THREE

Drowned Skeletons – 60gs – Read the minds of the drowned skeletons

At the far right side of Chapter 3 there are 2 mobsters you need to get rid of. They will run off to the right. Follow them to the end of the pier and then hold down LB to find the 2 drowned skeletons under water Read both their minds and the achievement will unlock.

CHAPTER FIVE

Decoyception – 60gs – Have enemies chasing other enemies chasing you

About mid way through the level you will learn about decoy stickers. Grab the sticker from the lower agent and put it right on him. Immediately drop down and let him see you, then the other guard will see the first and a merry chase will ensue.

CHAPTER SIX

Lady in the Sky with Ducky – 60gs – Return a totally sweet alien to the stars

In the bottom middle there is a furnace area where the Fire is. Grab the Ducky here. Climb to the top middle before the main tower and there is a old lady. Give her the ducky and you will get the achievement.

Careful What You Wish For – 60gs – Read the mind of a lonely cat

On the middle roof there is a man who thinks he is cheese. If you read his mind you can grab the Mouse. Take this mouse to the right side to the lady with the cat. Showing up there with the mouse will make the lady drop the mouse. Read the cat’s mind once it is on the ground.

Subconscious Experience – 60gs – Read Harry’s mind while he’s passed out

After a series of required events you will re-unite the ghost girl with the bunny. This sequence will knock out the guard named Harry. Then just read his mind after he is knocked out for the achievement.

Crew of the Dead – 60gs – Read the minds of the ambulance personel

Right after clearing the tunnel head to the right and there will be a large ambulance sticker to pull back. Read the minds of the 2 crew for the achievement.

Tower Offense – 60gs – Climb the asylum tower without alerting any nurses

The tower section is the middle tower above the roof. You can restart it at any time if you get seen by just getting captured and starting from the Mr Copy. Start in the bottom right and pull up to the right. Grab the ZZZs from the middle nurse and put her to sleep. Climb to the right and wait for her to wake up again. Then grab the new set of ZZZs and put the next nurse to sleep. Then simply climb the last section to get the achievement.

CHAPTER SEVEN

The Bird in the Sky – 60gs – Never get noticed by the helicopter

I’d go for this straight away. There are 2 main sections. Best to just watch the video.

Eureka! – 60gs – Give poor Ron the perfect idea for a date

Ron is in a tearaway Police station. You then need to go all the way around the level till you get past the second and last helicopter section get to the helicopter pilot talking to a woman. Tearaway that building and grab the Poster. This is what Ron wants.

Food for Thought – 60gs – Read the mind of an eaten fish

Grab the screaming lips from the opera singer in the upper right. Put those lips on the megaphone of the helicopter screaming at his woman. This will drop the fish and the pelican will comes get it. Head back near the start to the giant billboard and mind read the fish in the bird’s belly.

CHAPTER NINE

Out of His Mind – 60gs – Read Ray’s mind

Right at the start use Ted to read Ray’s mind. This is before you grab the first sticker.

Unnatural Talent – 60gs – Read Luigi’s mind while he’s singing

In the bottom left there is a Elvis. Take his guitar. Middle bottom there is another Elvis. Trade Guitar for Singing. Then to the left of that is a chorus of zombies. Give one the mouth and then read his mind afterwards.

Love is Blind – 60gs – Read the minds of an unexpected couple

From the end of Unnatural Talent grab the hair and head up to the Yeti in the cell. Give her the hair and then follow them outside and read the Yeti’s mind.

Conga Line! – 60gs – Get chased by 5 enemies at the same time

On the right is a section with 5 enemies. Simply use the push pins to quickly move around the area until all 5 are chasing you. Achievement popped for me when I cleared the area.

Dangerous Work – 60gs – Mind-read the recently departed

OK. Get the chimney from above the worker right at the start. Give the chimney to Santa in the bottom right to get the Present. Give the present to the zombie near the beginning with the shotgun. After the scene you need to read both the woman’s and the zombie’s mind BEFORE you progress their story. If you use the glass you will need to re-start the chapter.